Category: EDCI 336 (Page 1 of 3)

This is a category for the EdTech course. Please add this category in addition to the relevant edtech assignment category(ies).

Design Lab

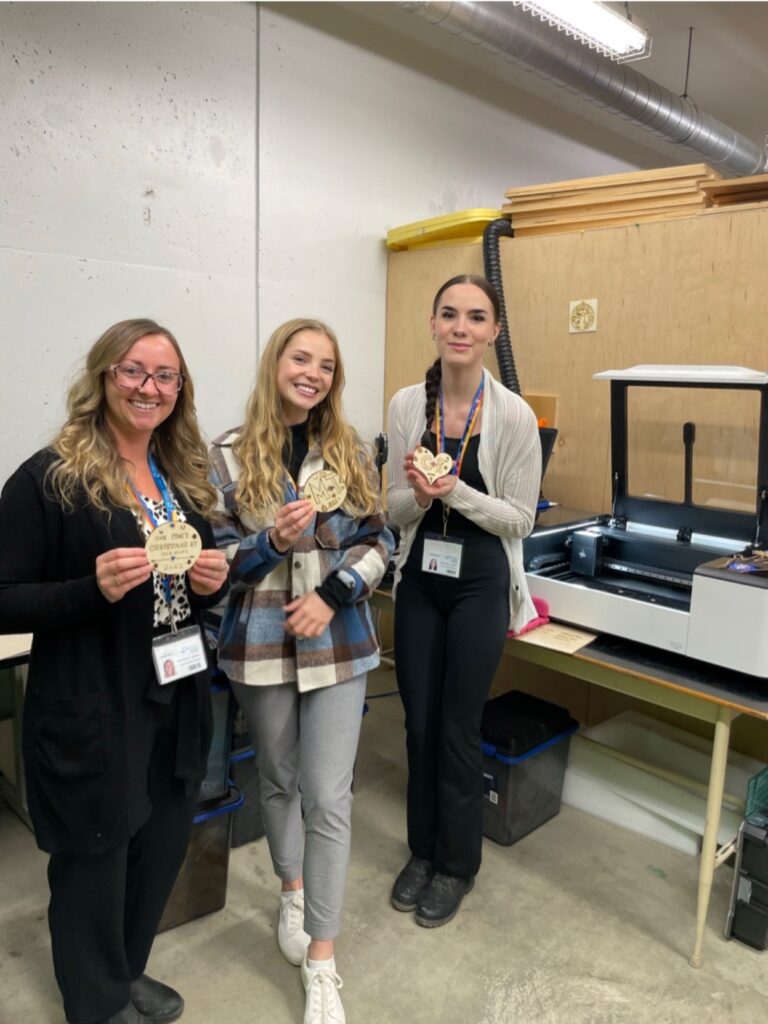
We created ornaments with the laser cutter machine 🙂

For one of our last technology classes, we got the chance to visit the School District #5 Design Lab located at Kootenay Orchards Elementary School (basement), and to say it was amazing would be an understatement! It was filled with endless resources for teachers covering absolutely every subject, unit and grade. ALSO, the technology resources that Ryan showed us and what we got to “play” with were fascinating.  

Our class got the chance to have an hour to look around and experience some of the technology resources they had available – I instantly went to the laser cutting machine! I feel when I become a teacher, I will be booking in to use this, as I feel you can do so many lessons based around it. Some examples being: 

  • Art: they can draw out an image then have it printed onto a piece of wood and then paint it. 
  • Math: learn about shapes, proportions. They can even can make their own manipulatives to use when they are doing math as well as make their own rulers.
  • Tech: make characters for stop motion videos. 
  • Literacy: they can create a character, print it then write a descriptive sentence about it. 

The opportunities are endless! 

LASER CUTTING MACHINE IN ACTION

Some of the Available Resources at the Design Lab:

Models:

hey had a variety of models available ranging from real digestive system (cat) model to the human brain (fake).

Equipment:

There were many types of equipment available such as drums, snowshoes, skies, adventure backpacks etc.

Technology Equipment:

Apps – Minecraft, Science journal, Scratch Jr, Flip A Clip, etc. Other – Computers, iPads, Green screen, Geocaching trackers, Drones, Coding, Robotics equipment, Robots, etc.

In Class Resources:

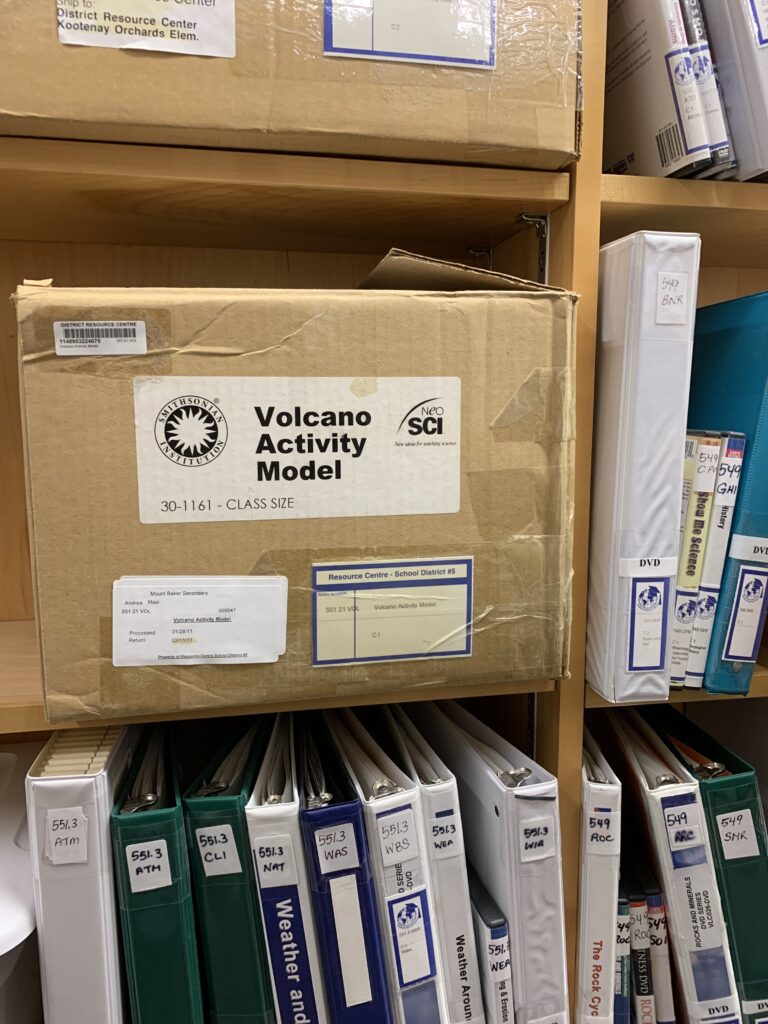
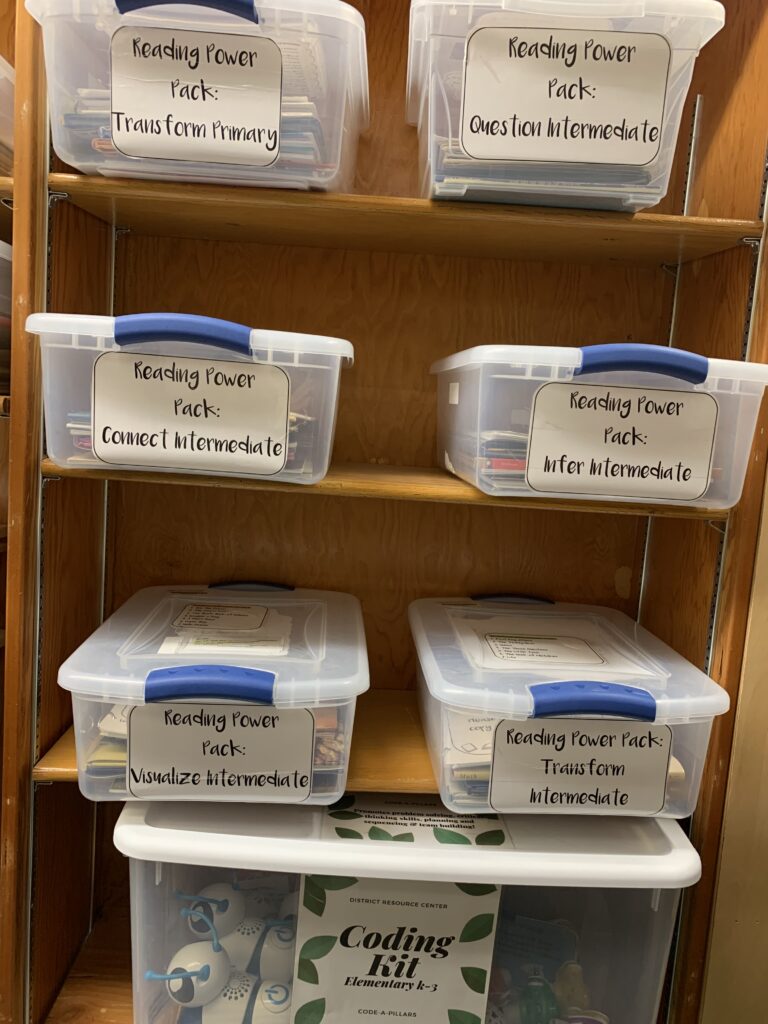
Variety of books (chapter books, visual, massive books, Indigenous), math kits, science kits, history kits, movies, coding kits, experiments, activity kits.

Whatever you want, they probably have it!

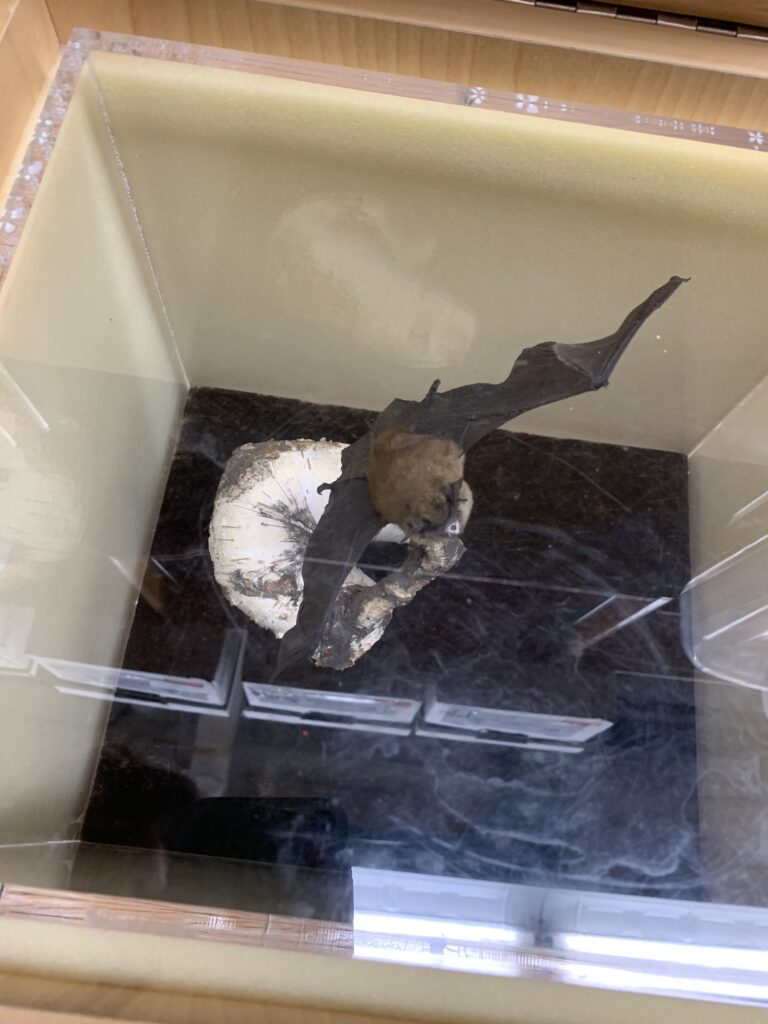
Examples of some resources they have:

Bat model
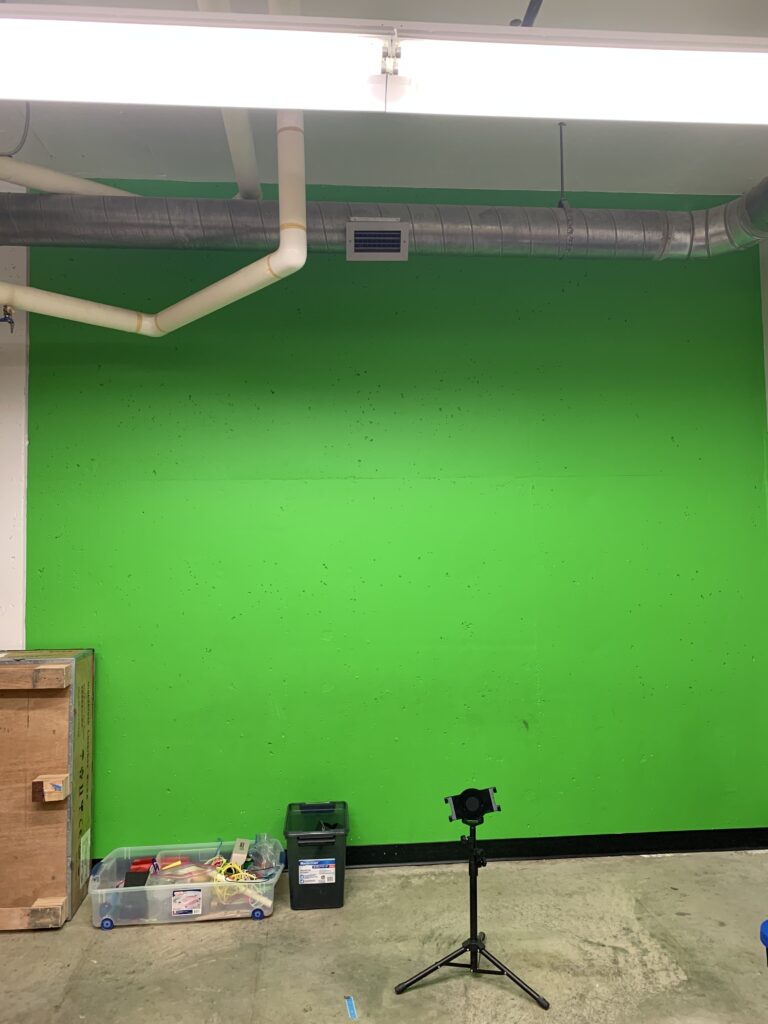
Green “screen”

Wrapping things up…

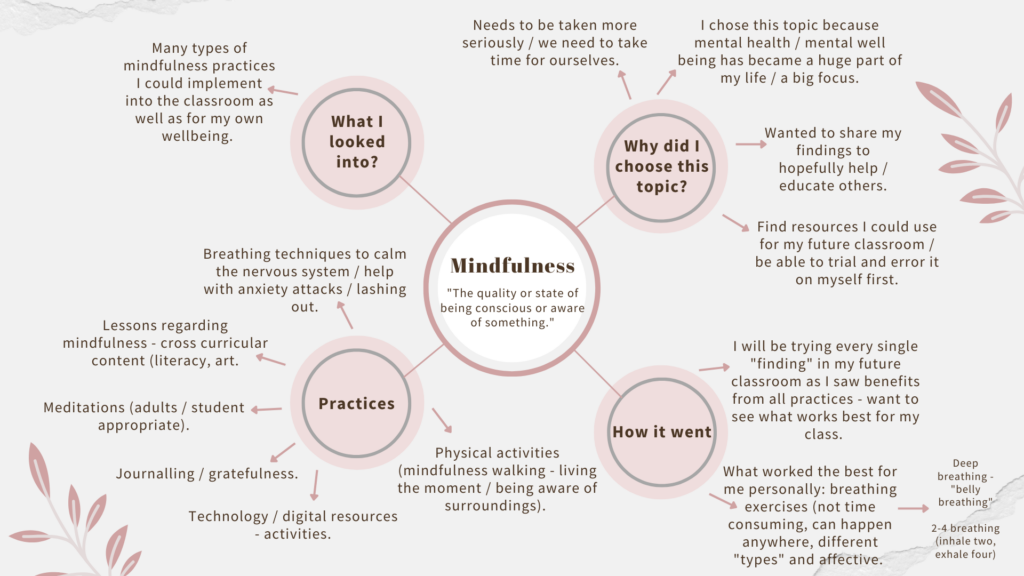
Well.. this is my final post regarding my mindfulness journey. This assignment has allowed me to dive into and learn about a topic I am extremely passionate about. It has also allowed me to gain knowledge to further share with my future students in the hopes they too see and feel the benefits of this wonderful practice, and continue to benefit from it in the future just like I have.

I would like to thank you so much for following along, and I hope you were able to incorporate one of these practices into your life!

Mind Map – Mindfulness Journey Recap

Awesome mindfulness videos you should check out! 🙂

Thanks again for following along! See ya!

SeeSaw

What is a digital portfolio? 

A digital portfolio is a platform that allows you to keep track of everything you have accomplished right in the palm of your hand. In addition, SeeSaw is an online tool (desktop browser or App) that allows you to collect digitized artifacts of student’s work as well as create and store student’s individual portfolios.  

How can digital portfolios be used in the classroom? 

A digital portfolio can be used in the classroom in many ways.  

Some examples being: 

  • To keep in touch / keep parents in the loop with their child’s learning / progress. 
  • Keeping track digitally with assessments (videos, pictures). 
  • Getting students comfortable using technology – asking them to upload their own work to their individual profiles.  
  • Keeps track of the student’s videos, pictures, drawings, voice recordings or documents. 

Experience with SeeSaw: 

Personally, when I was in school, we did not have the luxury of digital portfolios such as Seesaw, everything was in a hard copy (paper). However, since I have been working in the school system, I have seen more of these platforms but did not have the chance to dive in and see the ins and outs until our last tech class where we did get to learn all about it.  

Using SeeSaw in my future classroom: 

I will 100% be utilizing this app in my future classroom as I can see the many benefits of using it. This platform allows you to… 

 – Connect with students and their parents in a matter of seconds. 

– Allows for quick sharing (real time) of student’s progress / assignments. 

– You control who sees what (no other people can see the students work besides the designated parent). 

– Allows for formal and informal assessments.  

-Free resource for teachers, parents and students.

– You have control over approving the comments, work the students send in as well as who gets to be a part of the “digital class portfolio”. 

– Easy way to access students previous work when it comes to report cards / assessments (gets rid of the hassle of paper – hauling all the students work from school to home). 

You can have students explain their learning through video or voice recordings which you can refer to later on when needed. 

Learn more about SeeSaw:

Blog

Tutorial For Students:

Educational Technology Presentation (Round two)

Below is my groups final assignment video as well as our in class presentation / PowerPoint. Enjoy as we cover all thing regarding “Virtual Field Trips! 🙂

Another groups take on Virtual Field Trips (Virtual Reality)!

The gentlemen who presented this presentation were very passionate about this topic, which made it fun and entertaining to watch. 🙂

Different Types of VR!

Virtual Reality:

– There is an environment that you move around in (not reality environment – game environment).

Augmented reality:

– Uses the environment you are in – “see through” to the real World (ex: super hero glasses, windshield showing speed).

Extended reality:

– Merges the two VR and augmented reality (ex: military get to see through the plane they are in).

Tethered VR.

Pros:

  • Variety in learning.
  • New ways technology continues to advance high performance.
  • Can use without wifi if games are already downloaded.
  • Needs to be connected to an XBox.

Cons:

  • Outdated hardware + software.
  • Immobile.
  • Gaming bias (limited school content).
  • Motion sickness.
  • Expensive and arduous setup.

Educational applications:

Able to explore many different places / historic events such as titanic and Apollo 11.

Untethered VR.

Pros:

  • Simple setup.
  • Affordable ($399).
  • Diverse software (less gaming bias).
  • Can hookup with phones so you can interact with the stand alone VR.
  • Allows play boundaries.
  • Educational Software.
  • “Natural” do not need to learn how to use a controller.
  • “Comfort Levels” – indicating low or high intensity meaning can trigger motion sickness.

Cons:

  • Power – recharge it.
  • Distracting for students.
  • One player at a time on the device.
  • Needs proper wifi as it takes forever to load – if games are not downloaded.
  • Limited support for people with physical limitations.

Educational applications:

– Librarium (mind palace – customize – studying resources like for medical school, there are courses available on this app).

– Hand physics labs (using manipulatives ex: sorting, moving, petting animals).

– Star chart (floating in space, interacting with planets / stars) Introduce in gr.5.

TECH DEMO!!!

Remonstration of Untethered VR – In class presentation

Mindfulness Breathing…

We breathe all day, every day without thinking about it—but something truly transformative can happen when the breath becomes something we do think about.” – Maggie Seaver.

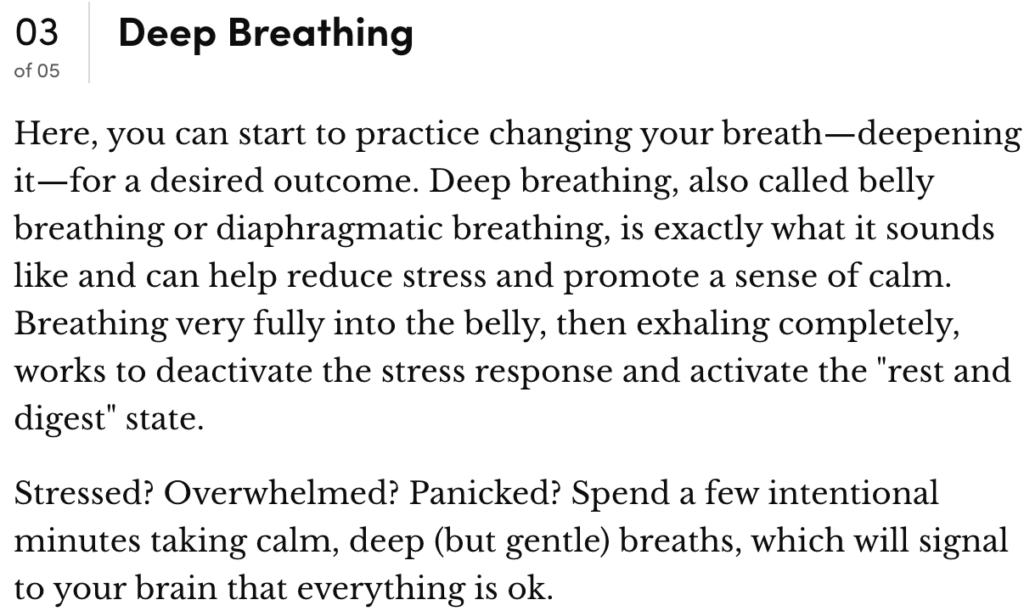
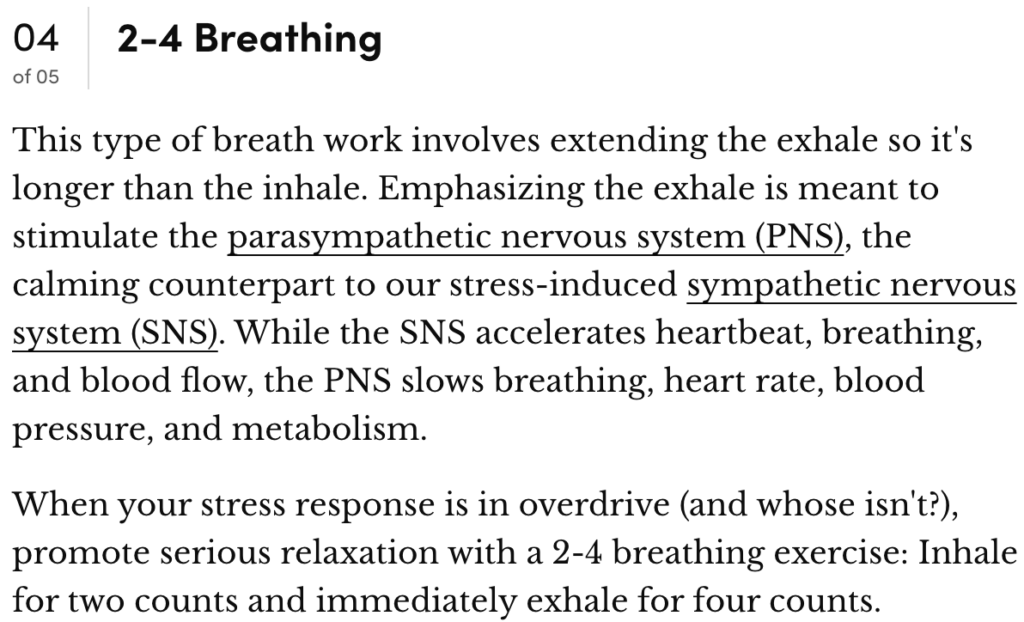
In addition to my previous post, I wanted to stay on the topic of breathing and how it contributes to mindfulness and wellbeing. I came across an awesome blog style website called realsimple.com, they have a bunch of helpful resources ranging from saving money to recipes, but of course the category that stood out to me most was the “health” tab, category “mental health”. Clicking this “mental health” category opened me up to a World of self-care and mental wellness articles. And of course, I found a post strictly on breathing exercises!! 

The article is named “5 Mindfulness Breathing Exercises You Can Do Anywhere, Anytime”, and Maggie Seaver (author) lays out each mindfulness breathing exercise, the benefits of each and the ways in which you should complete them.  

The last five days I have practiced each of them once a day and found the ones I felt best suited me and the ones that I am whiling to give more time to. The two I found most helpful in taking me to a state of calmness were, “deep breathing” and “2-4 breathing”, I am excited to further use these techniques and share them with others in the hope they too help bring calmness to their lives! Give them a try! 🙂

www.realsimple.com
www.realsimple.com

Breathing in the classroom:

In addition, I feel that trying these five breathing techniques each week in a classroom would be a great way to introduce the benefits of using our own breath to calm our nervous system to students. You could introduce them individually, then once the students are familiar with each technique you could give them the option of using the one that best suits them. 

Group Educational Technology Presentations

Group 1 Presentation: What makes a good classroom blog / website? – Using resources that make learning fun and engaging!

ClassDojo:

This resource allows teachers to successfully communicate between students and their families. The communication features they can use are sharing class photos, videos and sending messages.

Pros:

  • Free resource.
  • Easy to navigate / easy editing options.
  • Private password protected.
  • Parent ONLY sees their child’s work and their pictures.
  • Great resources for communication between teachers and parents.

Cons:

  • Every student will need access to technology.
  • Some features are not available unless you purchase the other “plus” version.

Classroom Screen:

An online resource that allows you to have a “screen” on your classroom white board / Smartboard that organizes all your cool digits you want to have visible for your students.

Pros:

  • You can alter your “screen” to best suit your classroom.
  • Awesome features that would benefit your classroom: timers, digital dice, QR code, polls, shows your class if they are being too LOUD etc.

Cons:

  • You need to purchase in order to save your work.

Jotform:

A website that you can create your own forms that would best suit your classroom.

Pros:

  • Free Resource.
  • Easy navigate.
  • Can be password protect.
  • Easy communication between teachers and parents.

Cons:

  • Not geared for student-use.

Seesaw:

Great website to communicate with your students and their parents as a teacher. This website is also private so only the people you let have access can have access such as your whole class and the chosen guardian.

Pros:

  • Free resource.
  • Easy to navigate.
  • Available on website or App.
  • Private / Password protected.

Cons:

  • Every student must have a technology device they an access outside of the classroom.

Group 2 Presentation: How can we create a more inclusive classroom using Technology? – Having options that best suit every single student in your classroom, using resources that benefit them and set them up for success.

Classrooms via Video:

Examples: Zoom and Teams.

These websites allow you to communicate with your students via video technology. They are great resources if students are unable to make it into the classroom, you can record the lesson and it allows the option of screensharing so students can see what the teacher is presenting.

Online classrooms:

Blackboard and Brightspace (Post Secondary online “classrooms”)

Google classrooms (Elementary-Secondary)

Pros:

  • More options for learning online such as providing links to videos, discussion forms and the option of handing assignments in online.
  • Can be accessed at anytime, anywhere on a phone, tablet or computer.
  • Can refer back to assignments, work, discussions.
  • Share ideas without presenting: every student has a voice with online classrooms!

Cons:

  • Learning curve for everyone!
  • Troubleshooting.
  • Some students do not have access to technology outside the classroom.

Immersive Reader:

Immersive reader is a resource that helps students (anyone) increase their reading abilities and helps individuals that struggle with reading. This resource is partnered with Microsoft and has many amazing features.

Pros:

  • Can adjust it to suit learning needs.
  • Offers support when there may not be enough support in the classroom.
  • Colour code parts of sentences (nouns, verbs).
  • Change speed of the reader.
  • Translating.
  • Can be used on phones, tablets, and computers.

Cons:

  • Students may rely on it to read.
  • Microsoft Office is not free.

Nearpod:

Pros:

  • Multiple forms to engage students.
  • Collaborative
  • Presentation: live or student paced.
  • Supports immersive readers.
  • Allows audio submissions.
  • Require student answers.
  • Assign Nearpod assignments in Google Classrooms.

Cons:

  • Requires every student to have access to technology
  • Does not support Canva

Risks:

  • Presentation and assessment is online
  • Not Canadian material

Group 3 Presentation: Why is it important to have/use technologies to support diverse learners in a classroom?
– Being able to have technology available for diverse learners allows everyone to be able to participate in every activity – no one is left out!

Seeing Al:

Seeing Al is a phone application that uses your phone to identify people or objects in the classroom and reports details back to you. You can also scan a document (assignment, notes, letters) and it will transfer all the information straight to your phone in a word document which can be read out loud to you! Amazing!

Eye Gaze Technology:

Eye gaze technology allows students that have speech disabilities and conditions such as cerebral palsy to use their eye movements to operate a laptop or computer so they can successfully communicate with others, participate in assignments and even play games!

Side Note: One of the cons is the expense of this device, ranging between $4,780-$6,500.

Breathe Think Do with Sesame Street:

This App helps students to regulate breathing and allows them to develop problem solving techniques / self-controls skills. This App is a fun way to teach students these skills and keep them engaged as they have a “monster” friend that they help everyday and get to complete daily tasks with.
Prodigy!

I had an absolute blast playing around on Prodigy in our technology class, it took me into an unknown technology World that I was excited to learn about! 

There are many benefits when it comes to using this resource in your classroom and as a teacher you have endless opportunities to alter the program to best suit your student’s needs! In addition, I feel this is a great resource for students, it makes learning Math and English fun, new and engaging.

The great features for TEACHERS:

  • You can track your student’s learning progress. 
  • It is aligned to the curriculum. 
  • You can assign certain levels / topics to best suit the individual student’s needs. 
  • Students come off more engaged with math when it is paired with Technology. 
  • It is a FREE resource in most school districts.
  • Easy to navigate.

Cool features for STUDENTS:

  • Being able to play with your friends / classmates. 
  • You can complete daily tasks / earn points. 
  • Answer math problems through “battles”. 
  • You can “rescue” pets and collect them as your own.  
  • You are learning either Math or English at the level that best suits you (controlled by teacher). 
  • Easy to navigate throughout website.

Pros and cons of gamifying a subject like Math: 

Pros:

  • Continuous engagement due to earning points, getting new pets, winning battles by answering the math problem correctly AND you get to unlock new parts of the map the more you play / win the battles. 
  • They can play it at home and not just in a school setting. 
  • The teacher can alter the grade level and apply it to the student’s account.  
  • Teachers can track the student’s progress and see some areas they need to work on. 
  • Allows students to trouble shoot technology. 
  • Students gain problem solving skills. 
  • Sparks growth mindset.
  • LASTLY, it is a great technology resource that allows students to further succeed in their learning in comparison to a normal “video game”. 

Cons:

  • Students could get distracted with other websites due to it being on an open browser. 
  • Sometimes technology is not always in our favour – running into login and loading issues.  
  • Some students may not have access to technology outside of the classroom.  
  • Only available for grades 1-8
  • They could become reliant on technology and find math outside this website “boring”. 
  • Increased screentime which has a lot of negative effects, especially for youth.  

An inside look into Prodigy

My Wizard

Students get to create their very own costume Wizards.

Question Examples

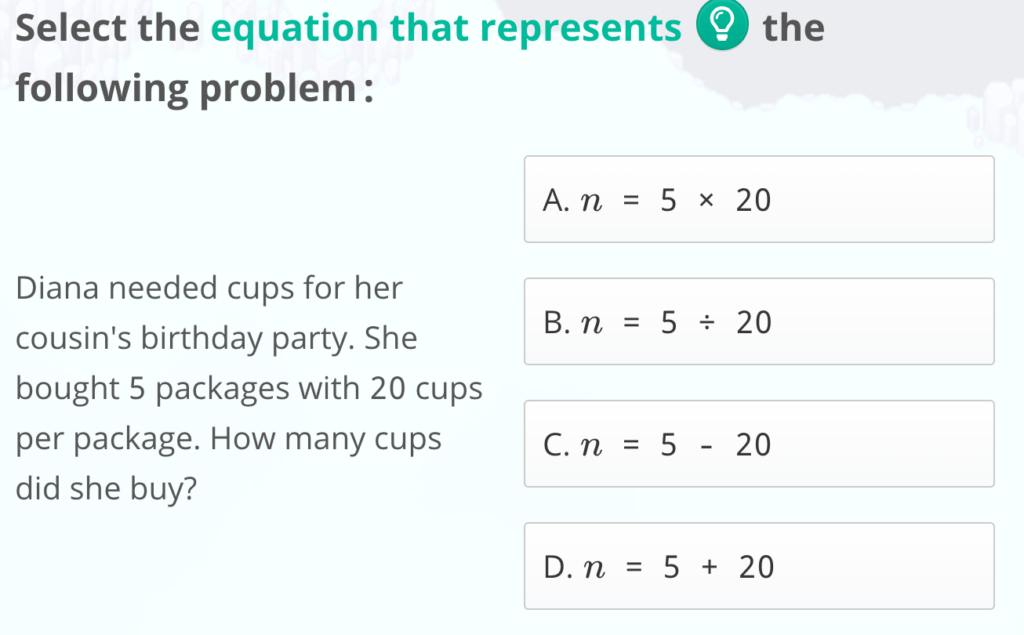
Here is an inside look into what the questions look like and the range of questions that can be asked.

As well as this website provides options where if a student is struggling they can click on the lightbulb and it will provide “tips” (top image shows an example of a tip)

Also, when the question pops up there is a lot of room for students to use the pen options to help “draw” out the question if that will help them successfully complete the question.

Both images screenshot from my Prodigy account.

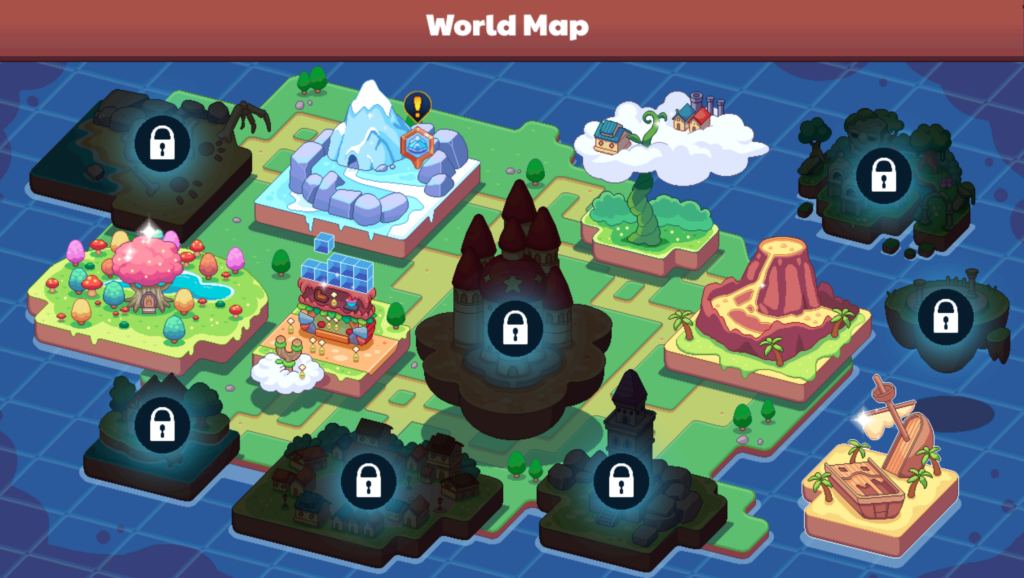
World Map

The more students play, the more different parts of the map they unlock which allows them to explore new locations, unlock more pets and “battle” new opponents.

I will definitely be incorporating this website into my future classroom! 🙂

Resources for Teachers (Mindfulness)

Photo by Amanda Jones on Unsplash

For this week’s mindfulness practice, I wanted to switch it up a bit! Instead of choosing a mindfulness practice I could do, I decided to take a look into the “teacher” side of mindfulness and search for ways you can implement it into your classroom on an educational level (activities, cross curricular lesson, etc.) I came across an awesome website called Education.com, this website has tons of resources for teachers, covers all grades and topics, AND most of the resources are FREE!  

The lesson plan that stuck out to me most was “Paying Attention with Animal Breaths”. The reason it stuck out to me was most was because of its focus on using your breath. I feel that teaching breathing techniques early on could be a beneficial lesson for students as they can revert back to it in hard situations, explain it to others that are experiencing a hard time and it does not need any exterior materials, just yourself! Plus, from personal experiences I have noticed it calms the nervous system and takes your mind to a place of calmness and being in the present moment. Lastly, I love how the students can create their own “animal breath” that they can use forever and it is a cross curricular lesson as it incorporates literacy and art skills.

I strongly encourage you to check this website out and maybe create an “animal breath” of your own! 🙂

“Paying Attention with Animal Breaths” Lesson Plan PDF.

Coding

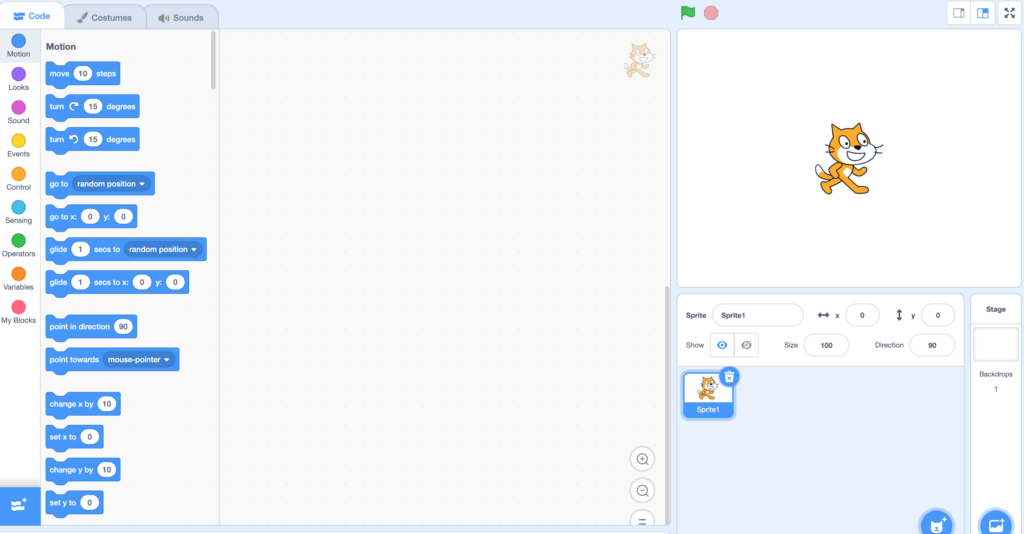
Scratch is a program where you can create visual programming in a fun and engaging way. This program is intended for students 8+ due to you having to have some previous knowledge as well as you have to be able to navigate through the may features on the platform. Scratch programming allows you to make games, stories, music and a list of other awesome animations.  

I personally had a hard time understanding how coding worked on the website and it took me awhile to create my first coding animation. After a debatable amount of time, I finally understood how the program worked and I did end up having a good time playing around with it. I can see the benefits of coding and I could see it being useful in a classroom setting. The reasons I feel coding would be beneficial in the classroom is because: 

  • Sparks imagination and creativity. 
  • Helps students develop problem solving skills.   
  • Introduces the students to another part of the ever-growing technological world. 
  • Lastly, it is setting the students up for the real world – all jobs / schools have a heavy focus on technology.  

I will definitely be using this website in my future classroom! 🙂

ScratchJr

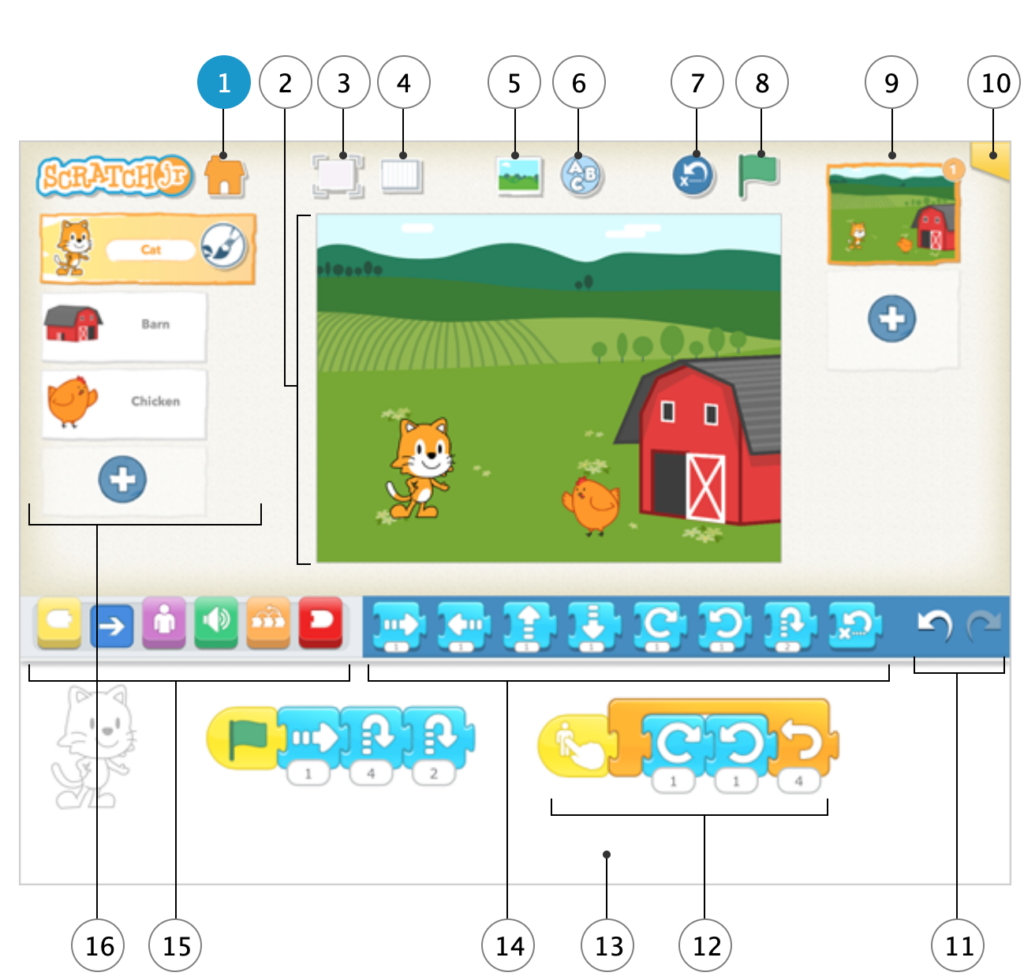
ScratchJr is a coding program but is better suited for younger students and ones that are just getting their feet into the world of coding. The layout of scratchjr is very user friendly, is less complex when it comes to structuring movements in your animation and has a lot less options throughout the program.

Visual comparison of Scratch vs. ScratchJr

Scratch
https://scratch.mit.edu/projects/755089594/editor
ScratchJr
https://www.scratchjr.org/learn/interface

My first ever coding animation!

Very happy with how it turned out! 🙂

https://scratch.mit.edu/projects/754638181

Marysville Elementary In-Situ!

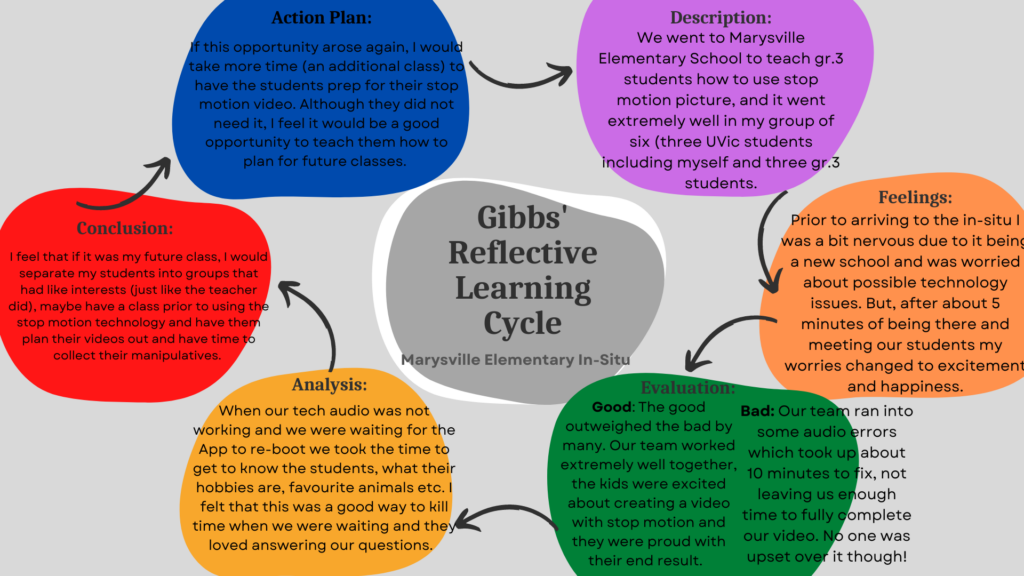
Reflection Using Gibbs’ Learning Cycle


Created on Canva by Me.

Collaborative Stop Motion Video with Gr.3’s

Created on Zing Studio

Our group had an absolute blast creating a stop motion video using the App Zing Studio. Our three students worked extremely well as a team and had similar ideas on how they wanted to tell their stories through using their props. The students already had some experience with the App and were so excited to SHOW US how to navigate the ins and outs of it.  

All in all, I am so happy I got the opportunity to experience working in Marysville Elementary School and understand what makes this school so unique. I will definitely be applying here in the future! 🙂 

« Older posts